예시) 그림자 10dp만큼 넣기
android:elevation="10dp"
(주의사항) 그림자 영역을 설정한 뒤 그림자 영역이 보여질 만큼의 padding or margin을 설정을 해줘야 그림자를 볼 수 있습니다.
1. 뷰의 background color에 색상이 설정되어 있어야 합니다.
2. 뷰의 그림자가 생길 수 있는 여백이 있어야 합니다.
아래는 예시인 코드들을 적어보았습니다.
예시) elevation 설정 전
<?xml version="1.0" encoding="utf-8"?>
<android.support.constraint.ConstraintLayout xmlns:android="http://schemas.android.com/apk/res/android"
    xmlns:app="http://schemas.android.com/apk/res-auto"
    xmlns:tools="http://schemas.android.com/tools"
    android:layout_width="match_parent"
    android:layout_height="match_parent"
    android:background="#FFFFFF"
    tools:context=".MainActivity">

    <TextView
        android:layout_width="200dp"
        android:layout_height="200dp"
        android:background="#F0F0F0"
        android:gravity="center"
        android:text="Hello elevation!"
        app:layout_constraintBottom_toBottomOf="parent"
        app:layout_constraintLeft_toLeftOf="parent"
        app:layout_constraintRight_toRightOf="parent"
        app:layout_constraintTop_toTopOf="parent" />

</android.support.constraint.ConstraintLayout>
예시) elevation 설정 후(elevation=10dp)
<?xml version="1.0" encoding="utf-8"?>
<android.support.constraint.ConstraintLayout xmlns:android="http://schemas.android.com/apk/res/android"
    xmlns:app="http://schemas.android.com/apk/res-auto"
    xmlns:tools="http://schemas.android.com/tools"
    android:layout_width="match_parent"
    android:layout_height="match_parent"
    android:background="#FFFFFF"
    tools:context=".MainActivity">

    <TextView
        android:layout_width="200dp"
        android:layout_height="200dp"
        android:background="#F0F0F0"
        android:elevation="10dp"
        android:gravity="center"
        android:text="Hello elevation!"
        app:layout_constraintBottom_toBottomOf="parent"
        app:layout_constraintLeft_toLeftOf="parent"
        app:layout_constraintRight_toRightOf="parent"
        app:layout_constraintTop_toTopOf="parent" />

</android.support.constraint.ConstraintLayout>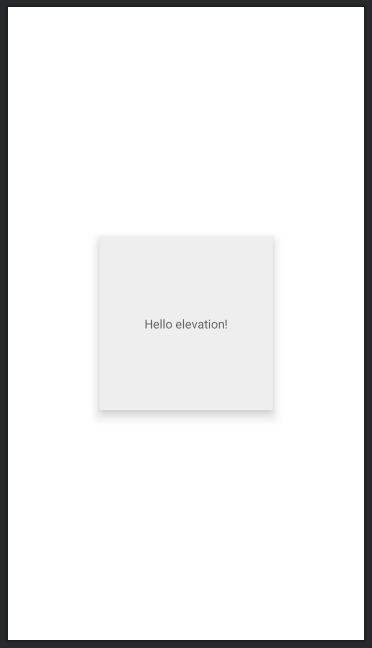
예시) elevation 설정 후(elevation=100dp)
<?xml version="1.0" encoding="utf-8"?>
<android.support.constraint.ConstraintLayout xmlns:android="http://schemas.android.com/apk/res/android"
    xmlns:app="http://schemas.android.com/apk/res-auto"
    xmlns:tools="http://schemas.android.com/tools"
    android:layout_width="match_parent"
    android:layout_height="match_parent"
    android:background="#FFFFFF"
    tools:context=".MainActivity">

    <TextView
        android:layout_width="200dp"
        android:layout_height="200dp"
        android:background="#F0F0F0"
        android:elevation="40dp"
        android:gravity="center"
        android:text="Hello elevation!"
        app:layout_constraintBottom_toBottomOf="parent"
        app:layout_constraintLeft_toLeftOf="parent"
        app:layout_constraintRight_toRightOf="parent"
        app:layout_constraintTop_toTopOf="parent" />

</android.support.constraint.ConstraintLayout>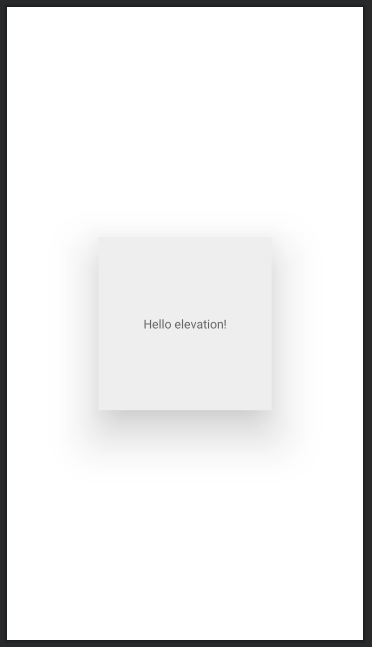
그림자를 어디에 줄 것인지 선택
OutlineProvider관련 설명입니다.
[Android] OutlineProvider에 대해
OutlineProvider 한국말로는 외곽선 제공자 정도인 것 같다. OutlineProvider가 영향을 끼치는 곳은 setClipToOutline과 elevation을 주었을 때 생기는 그림자정도 인 것 같다. 기본 View의 OutlineProvider는 BAC..
ohdbjj.tistory.com
반응형
'📱Android > 📱 Android (Java)' 카테고리의 다른 글
| [Android] LinearLayout orientation에 따른 layout배치 (0) | 2021.08.24 |
|---|---|
| [android] 현재시간구하기, 시간비교하기 (Date, diffDate) (0) | 2021.08.23 |
| 안드로이드 Log 종류 및 사용법 (0) | 2021.08.23 |
| [Android] 안드로이드 Glide로 gif파일 재생하기 (0) | 2021.08.23 |
| [Android] TextView(텍스트뷰) singleLine / ellipsize 사용법 (0) | 2021.08.23 |
| [Android] TextView에 이미지 설정하기(drawable) (0) | 2021.08.22 |
| [Android] android:drawableLeft를 사용 시 이미지 사이즈 조절 하는 방법 (0) | 2021.08.12 |
| [Android] Kotlin 기초 문법 (0) | 2021.06.03 |


